
Choose your own checkout flow – add what supporter information you need to collect. But be sure not to ask too much!
All of ConnectionPoint’s platforms ask your supporters for their full name and email address. You can ask for anything further, enter preamble messages, compliance messages, and more.
Important: Do not ask for too much information you don’t need. Some contributors might not want to give that information and, therefore, withdraw from the project.
Best practice suggestion: Ask for extra supporter information AFTER the contribution. This way, your supporters can choose not to provide that information but still contribute to your campaign. If this information is required (as in tax receipting), you’ll have the opportunity to ask supporters to update this info.
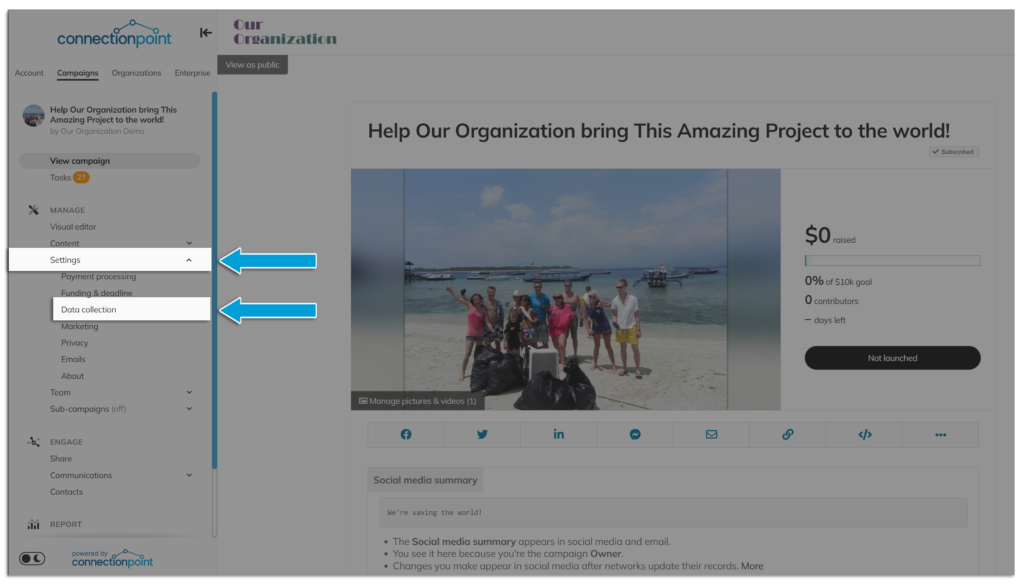
STEP 1 – Click ‘Data collection’ under ‘Settings.’ #
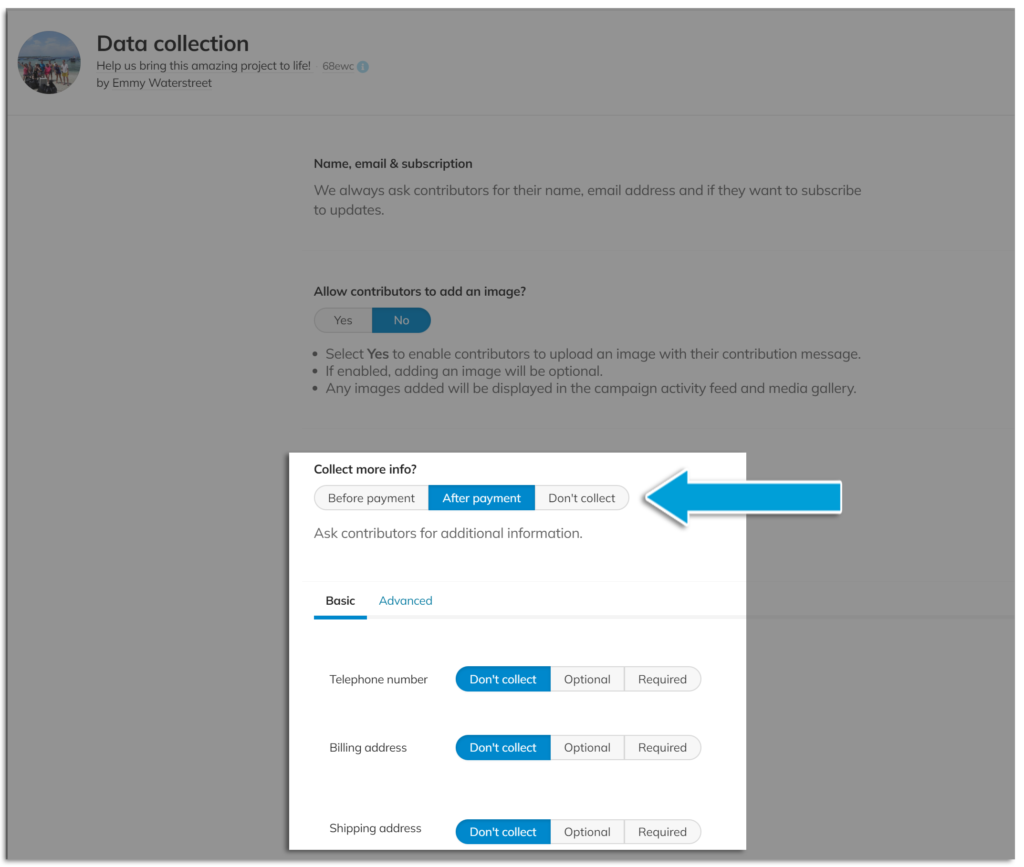
STEP 2 – Under ‘Collect more info?’, choose ‘Before payment’ or ‘After payment’ to open the options. #
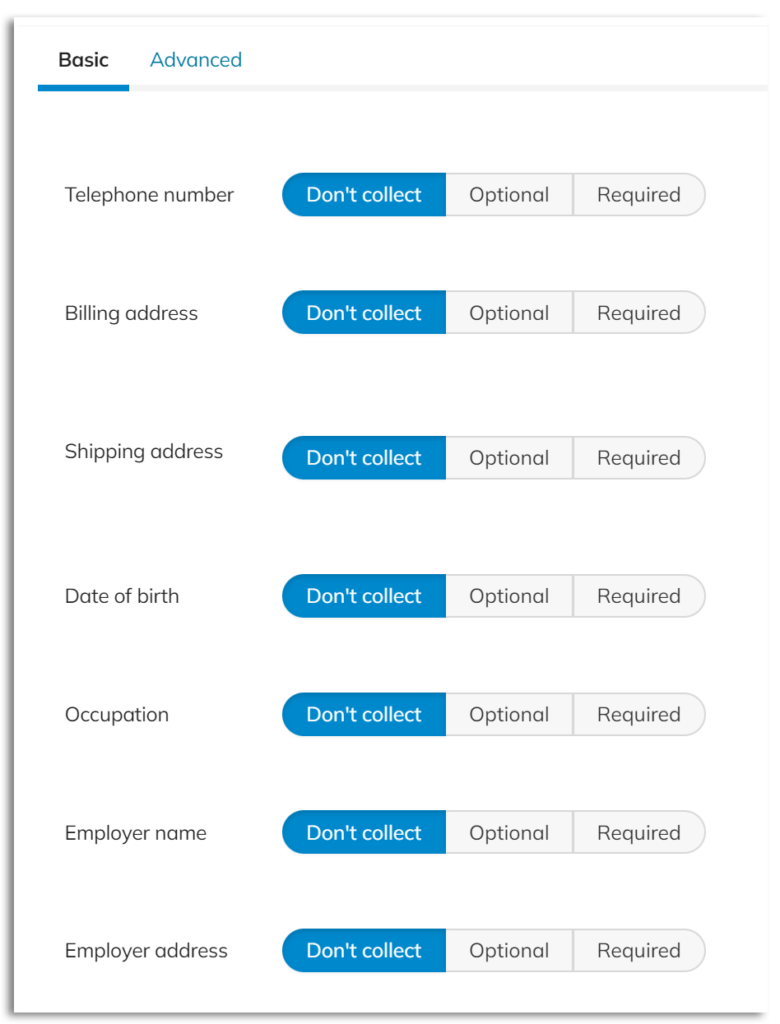
STEP 3 – Choose ‘Basic’ to see a list of premade options (and whether to make them ‘Optional’ or ‘Required’)….. #
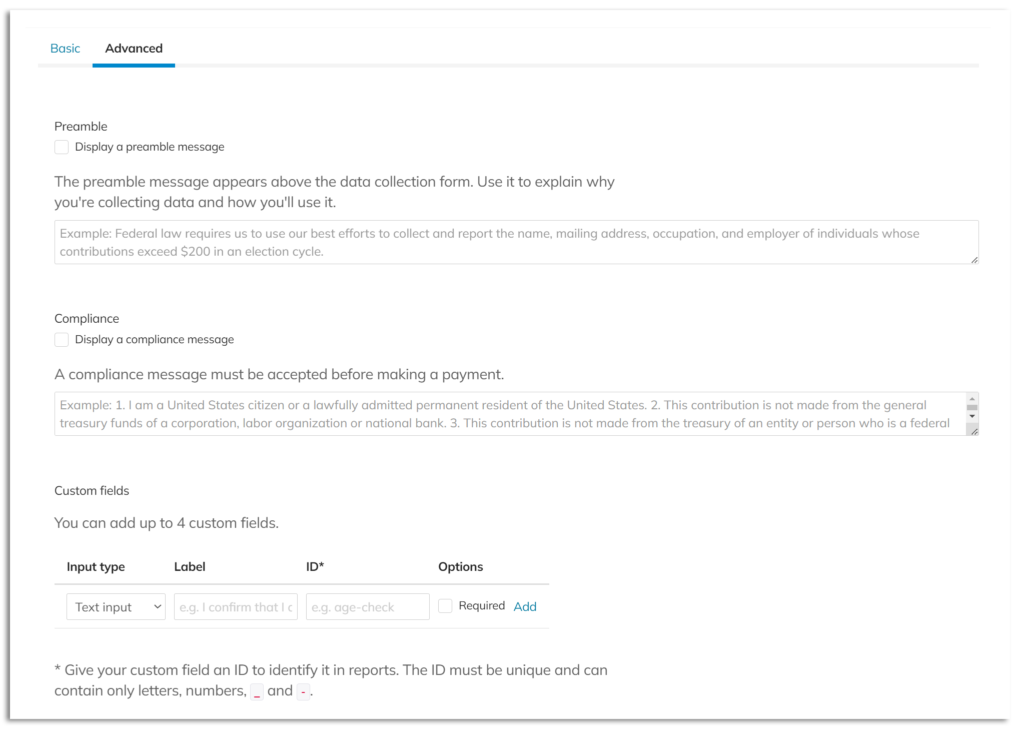
… or ‘Advanced’ for the preamble message that your supporters will see before they contribute, a compliance message option, and custom fields you may create on your own. #
*Make sure you click ‘Add’ once you customize an option.
STEP 4 – Save. #

Click here to find information from your supporters.


