
Contributions are made quickly and easily across ConnectionPoint platforms. The checkout experience has been redesigned to make it easier for supporters to review their contribution details, select available options, and complete their payment.
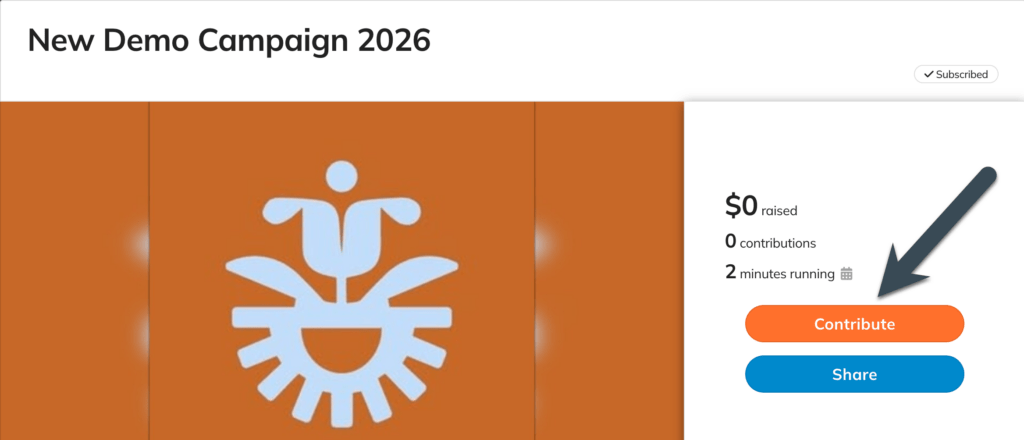
STEP 1 – Click ‘Contribute’ to begin the checkout process
STEP 2 – Select an incentive or just contribute
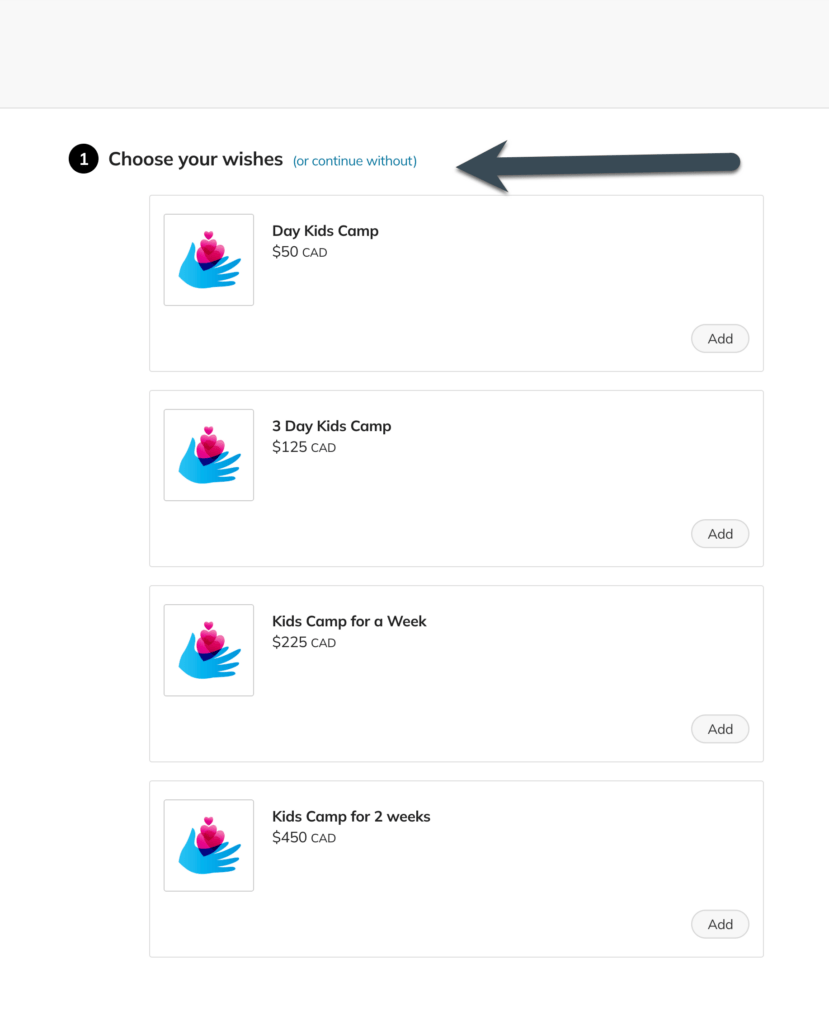
Some campaigns offer Rewards, including Perks, Products, Tickets, and/or Wishes. If available, you can select your preferred option during checkout.
If you don’t want to select a Reward and would like to make a contribution only, you can click ‘Or simply contribute’ at the top or ‘Continue without’ at the top.
If you want to claim a Perk, Order a Product, Buy a Ticket, or Grant a Wish, just click the Add button next to the one you want, then click Continue.
STEP 3 – Review your contribution. #
Before completing your contribution, you can review your selections and update available details, including Rewards, shipping information, promo codes, and other available options.
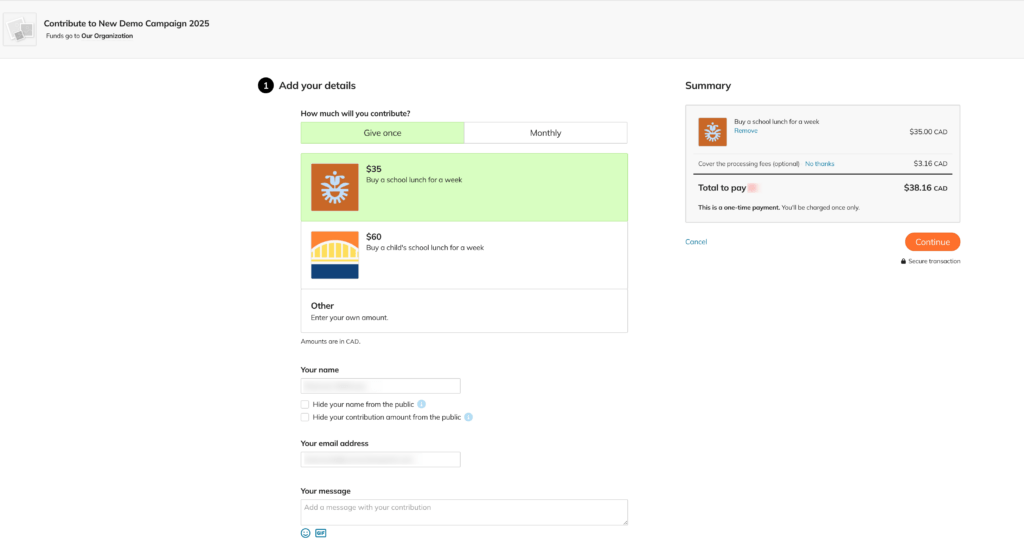
STEP 4 – Enter your contribution details.
Monthly contributions #
Some campaigns allow supporters to set up recurring contributions. If available, you can select the recurring contribution option during checkout. If recurring contributions are available, you will see the option during checkout when entering your contribution amount. Just check the box, and the amount you listed above will be contributed monthly. You can cancel at any time.
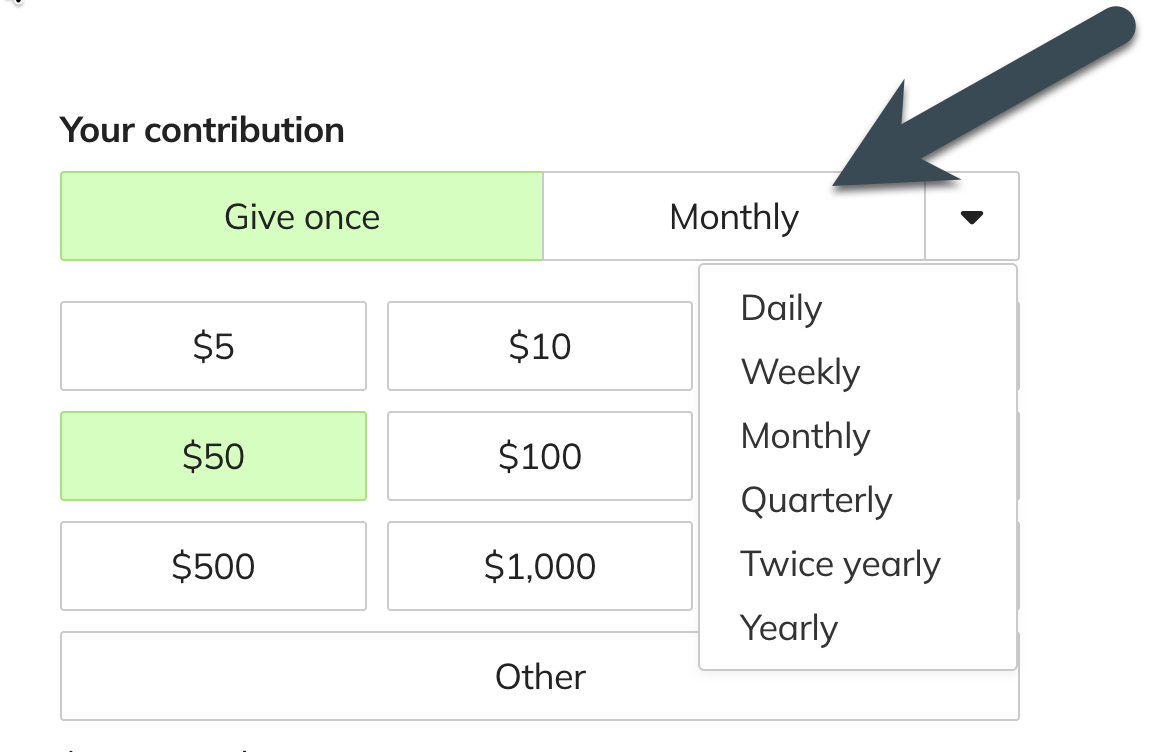
If you don’t see the checkbox, it just means this campaign’s owner/organization hasn’t set up monthly payments for their campaign. This option is only available for campaigns that have recurring contributions enabled.
Promo codes #
If you have a promo code, look for this section above your total contribution summary to enter it. Promo codes may be available for rewards, registrations, or other campaign-specific options.

Cover fees or Optional Tip #
During checkout, you will see your total contribution amount, along with any available fee or tip options.
The options available depend on the campaign’s pricing model and how the campaign owner has configured their campaign.
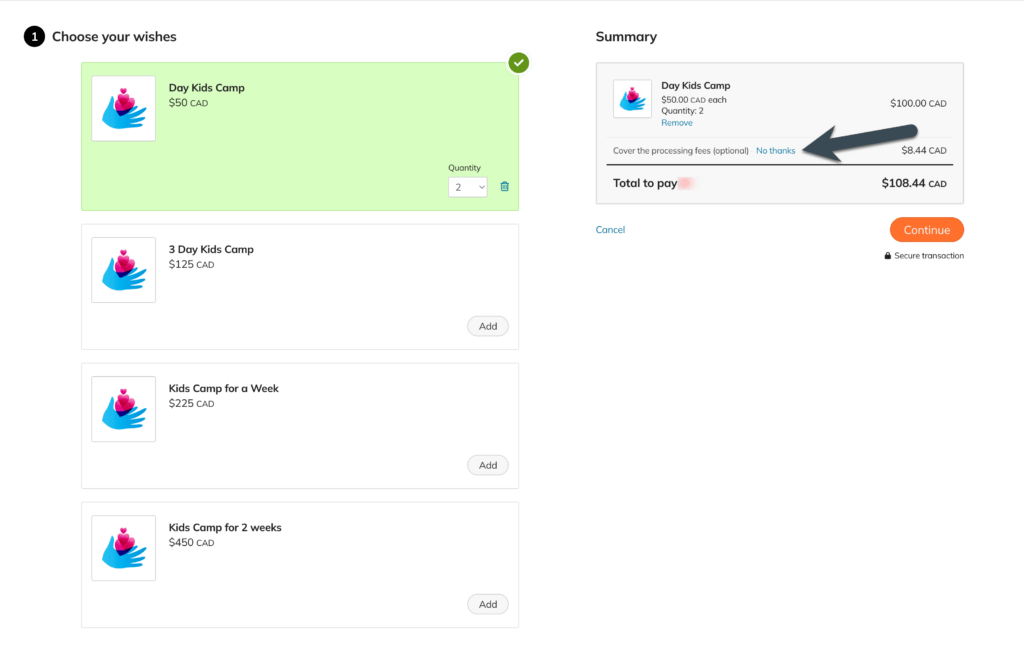
Cover Fees #
If the campaign uses the Fee Recovery pricing model, applicable platform fees and payment processing fees are included during checkout.
During checkout, you may have the option to cover these fees so the organization receives your full intended contribution amount.
For example:
- If you choose to cover the fees, the organization receives your full intended contribution amount.
- If you choose not to cover the fees, the applicable fees are deducted from the contribution amount the organization receives.
Some campaigns using the Keep the Most pricing model may also provide an option to help cover applicable platform fees.
Optional Tip #
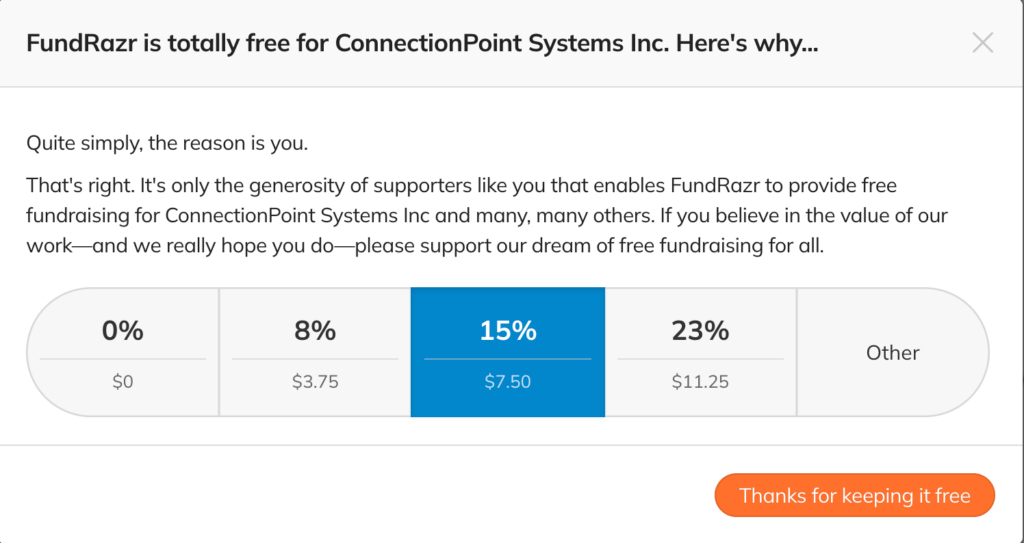
If the campaign uses the Optional Tip pricing model, you can leave a tip to support ConnectionPoint.
This amount is completely optional. If you do not wish to leave a tip, select Change tip amount and update the amount to $0.
Payment processing fees are handled by the connected payment provider (Stripe or PayPal). The final amount will always be displayed before you complete your contribution.
STEP 4 – Submit payment
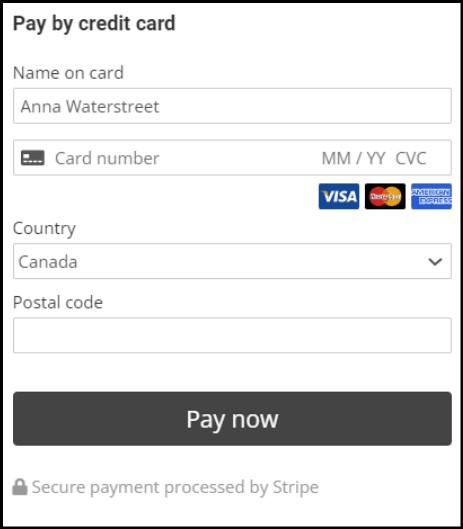
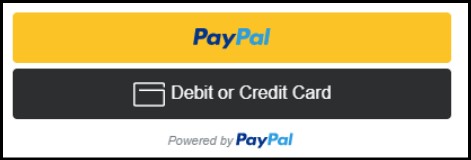
Depending on which payment processor the campaign is set up on or which option you chose if both were there, here’s how the payment screen will look:
Stripe
PayPal:
Note: Your ability to contribute will depend on your country. You may live in a country that cannot process either of these. Please contact support@connectionpoint.com if you are experiencing difficulty contributing to a campaign.
STEP 5 – Successful contribution and contact info
Once the payment has gone through, you will see the following screen:
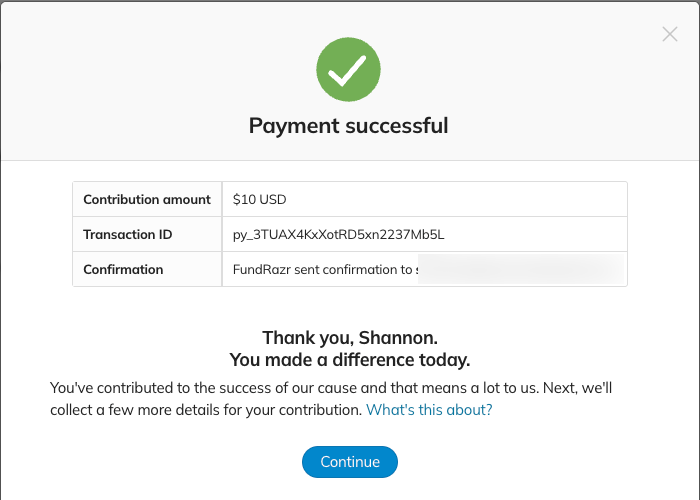
If the campaign offers rewards or is run by a non-profit organization, they may require extra information, such as a billing/shipping address. Depending on the user’s request, this will look different and may also appear BEFORE the payment process.
In that case, a screen will appear immediately after you complete the transaction, letting you know that the campaign owner requests your contact information for their records. Fill in the form and click Continue at the bottom.
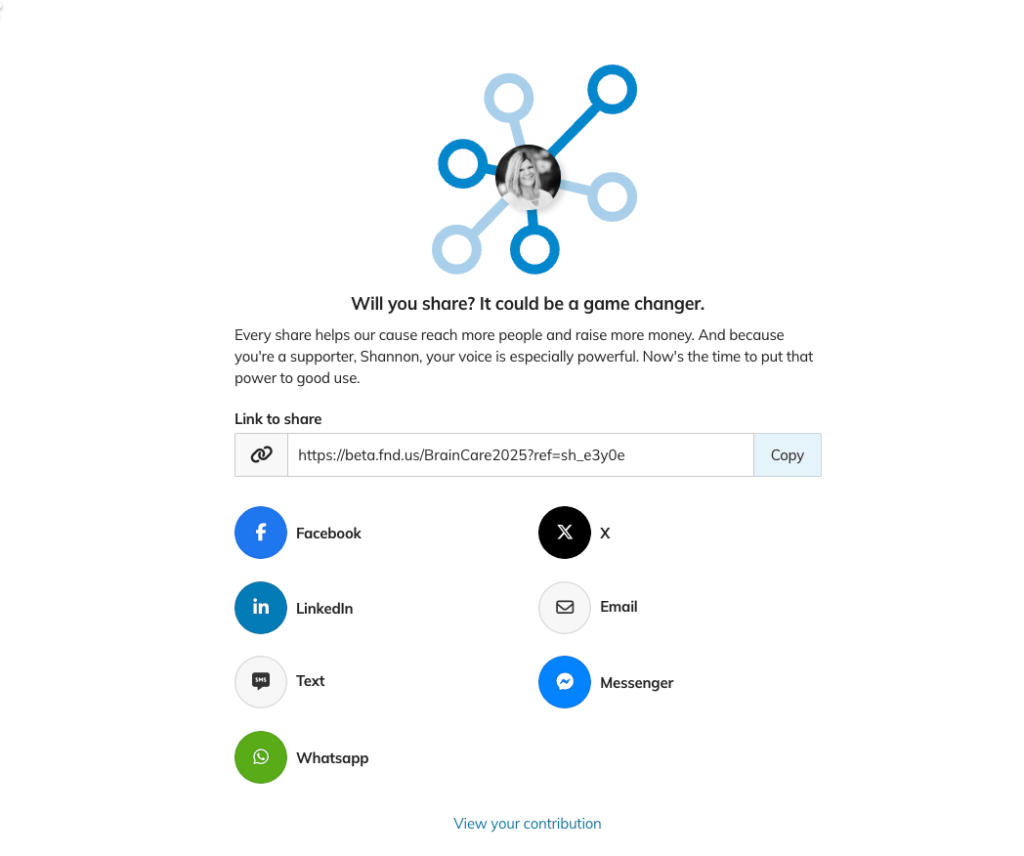
STEP 6 – Social sharing
After completing your contribution, you may have the option to share your support with your social network. Sharing increases awareness and helps campaigns reach more supporters. Ensure you write a message that explains why you’re sharing it. This is not mandatory; however, doing so significantly increases this campaign’s chances of success. And that’s what this is all about!
That’s it! You’ll receive a confirmation email and (if applicable) a tax receipt separately, all within approximately 15 minutes.