See how easy it is to create a campaign on FundRazr, CoCoPay, Crowdfundr, and PetFundr!
How to start a campaign #
Each platform has a link to start a new campaign on the homepage (CoCoPay users will find the ‘Start a campaign link on CoCoPay personal only). But here are the direct links to the campaign creation flows (You may begin here even if you already have a user account!):
Campaign creation flow #
Let’s look at the standard campaign creation flow together.
Begin
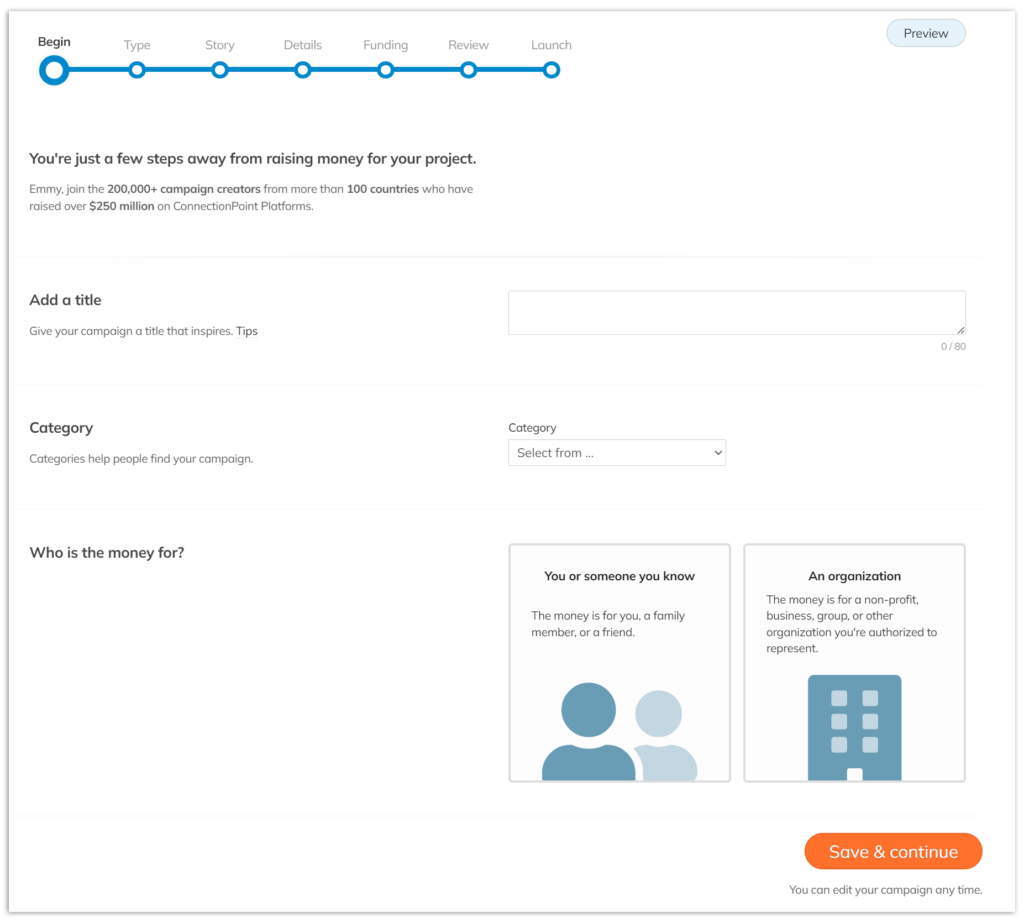
- Add a title – You do need to write a title before continuing, but you can always change it!
- Category – Pick what fits best; it is changeable later.
- Who is the money for? If you are an employee, volunteer, or otherwise authorized representative of an organization running this campaign, or you are a creator starting under your personal brand, choose ‘An organization.’ Otherwise, you want to choose ‘You or someone you know.’ For more information on who can or cannot run an organizational campaign, see this article.
Personal Campaign Flow #
*Click here to skip to the organizational campaign flow*

Story
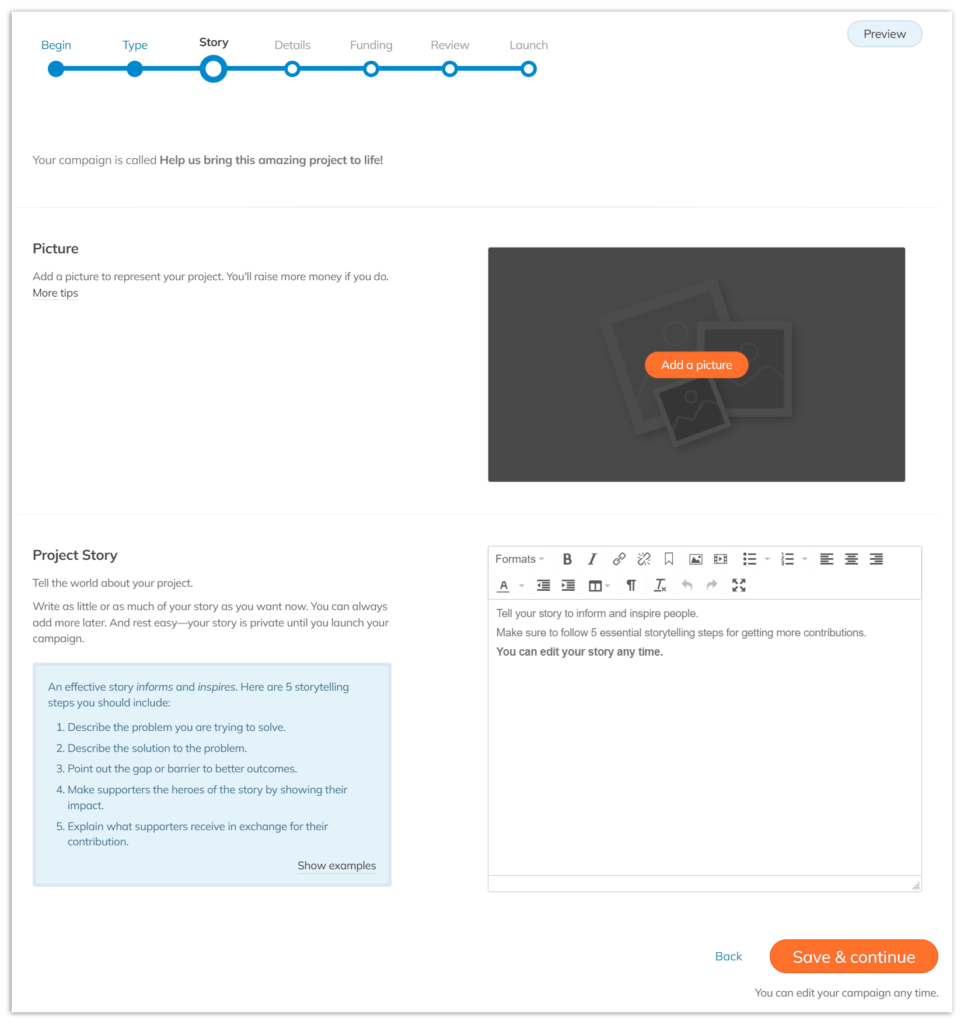
Add in your campaign cover image (you’ll be able to add more later!) and your story. If you aren’t ready for this part, that’s okay! You can just hit ‘Save & continue’ and work on this bit in the Visual editor later.
Details
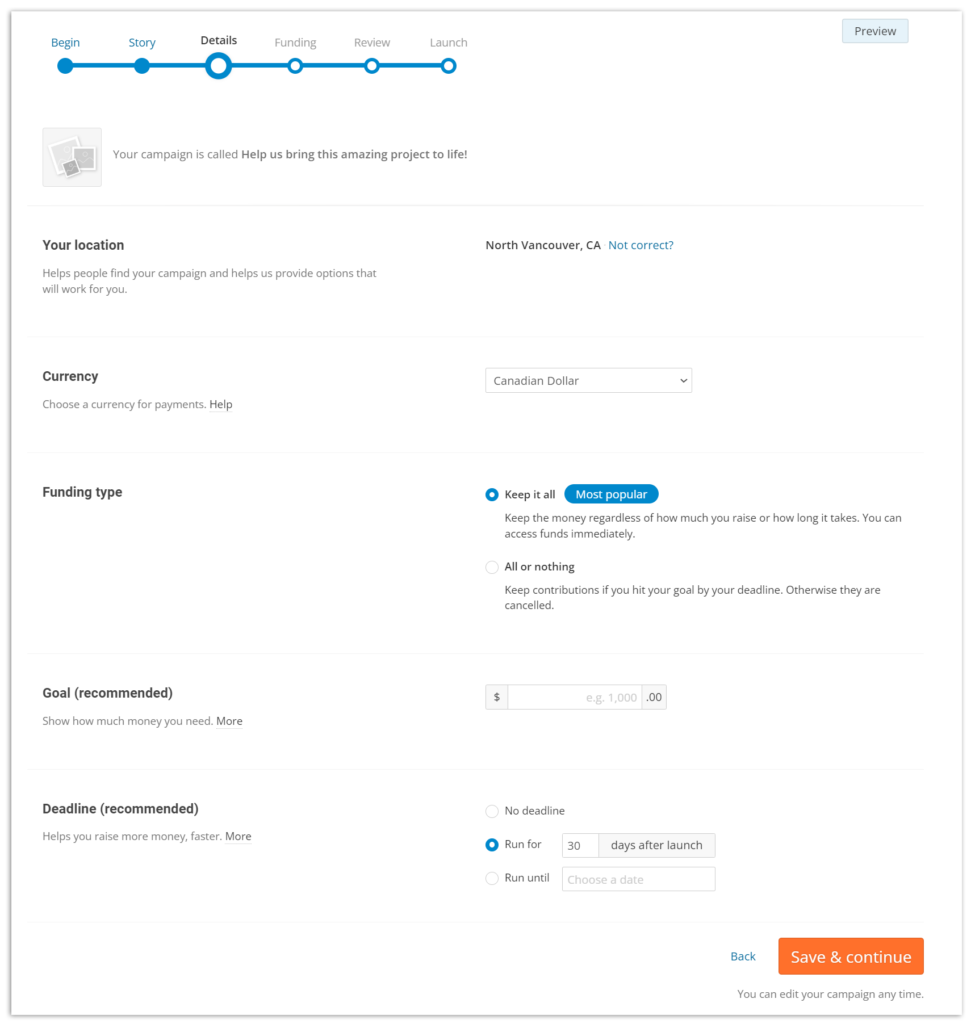
- Location – Your location helps supporters find and identify your campaign. If this is incorrect, simply click ‘Not correct?’ and change it.
- Currency – This is the currency you want to run your campaign in. Make sure your payment provider account is set up to accept this currency.
- Funding Type – If you’re unsure between Keep-it-all and All-or-nothing, this article may help.
- Goal and Deadline – If you choose ‘Keep-it-all,’ these are optional and changeable later on. If ‘All-or-nothing,’ these become mandatory and are unchangeable after the campaign is launched (but you may still change them in your editing before launch).
Funding
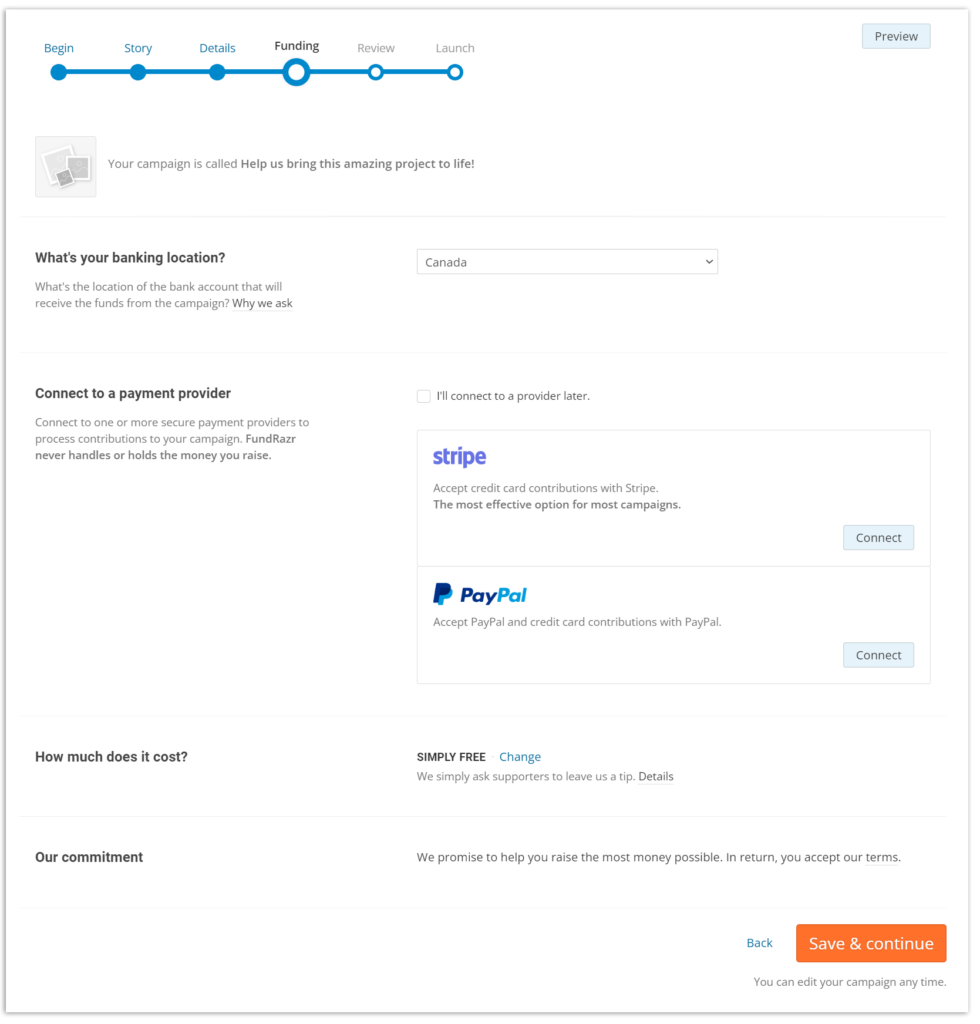
- Banking location – Set this location to whichever country the bank associated with your payment processing accounts is located in.
- Connect to a payment provider – If you aren’t ready to do this, just click off ‘I’ll connect to a provider later.’ You won’t be able to launch your campaign until you connect with a provider, but you can get your campaign ready and explore the platform.
- How much does it cost? Choose your pricing model here. For more details on the pricing models, read this article. You can change your mind later, even when the campaign is live!
- Terms & conditions – You agree to these once you hit ‘Save & continue.’ If you’d like to read them, you’ll find them here.
Review
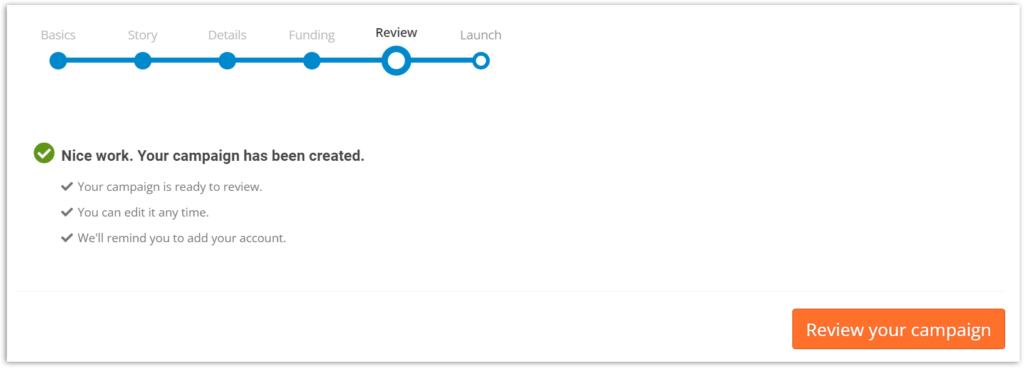
You’re done! Once you click the ‘Review your campaign’ button, you’ll be taken to our Visual Editor. Explore the Help Centre’s Campaign Management section for help with editing and launching your campaign.
Organization Campaign Flow #

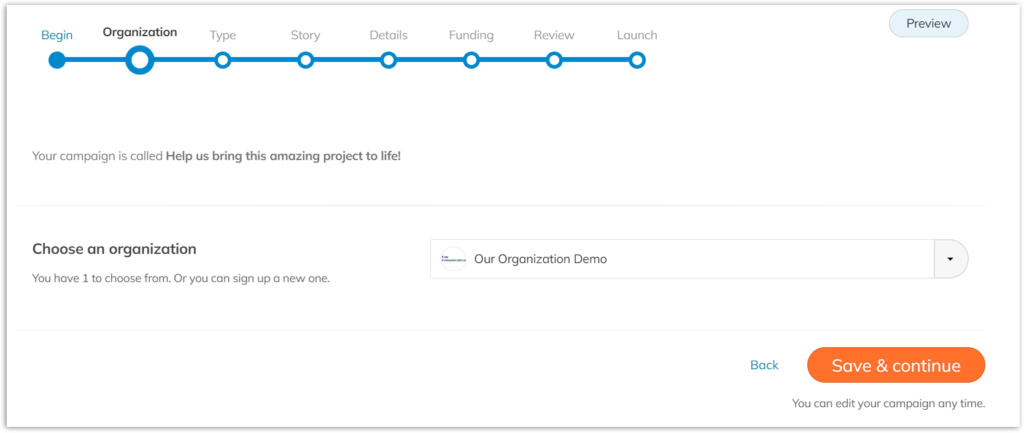
If you are already on an organization team on the platform you’re using, you’ll have the option to start this campaign under this organization. If this isn’t what you wish, you may sign up a new organization from the dropdown menu.
Story

Add in your campaign cover image (you’ll be able to add more later!) and your story. If you aren’t ready for this part, that’s okay! You can just hit ‘Save & continue’ and work on this bit in the Visual editor later.
Details

- Location – Your location helps supporters find and identify your campaign. If this is incorrect, simply click ‘Not correct?’ and change it.
- Currency – This is the currency you want to run your campaign in. Make sure your payment provider account is set up to accept this currency.
- Funding Type – If you’re unsure between Keep-it-all and All-or-nothing, this article may help.
- Goal and Deadline – If you choose ‘Keep-it-all,’ these are optional and changeable later on. If ‘All-or-nothing,’ these become mandatory and are unchangeable after the campaign is launched (but you may still change them in your editing before launch).
Funding
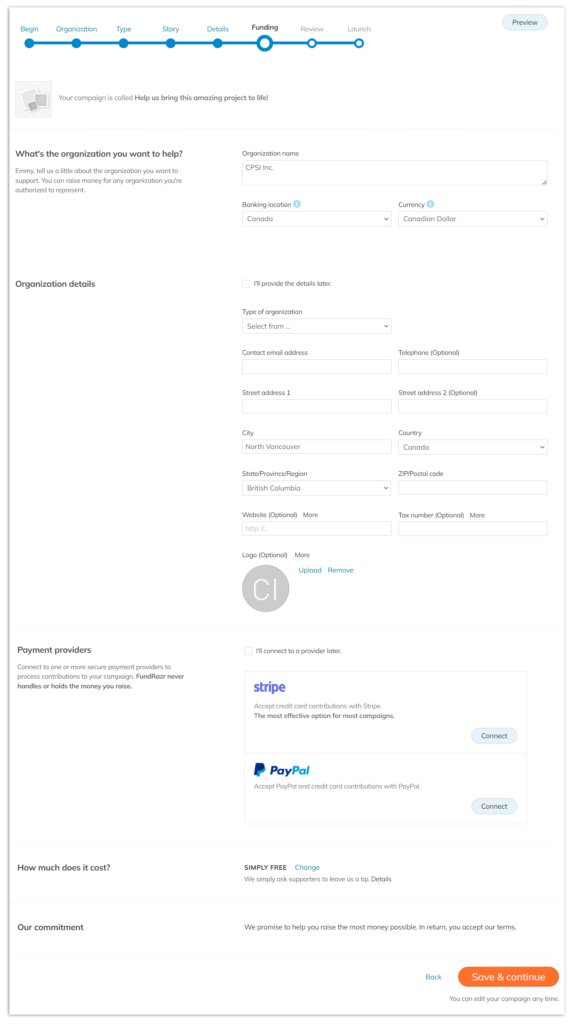
- Banking location – Set this location to whichever country the bank associated with your payment processing accounts is located in.
- Organization details – Enter these details now for an easier process later, but you may also skip this and add in info later! For more information on the logo and where it appears, review this article.
- Connect to a payment provider – If you aren’t ready to do this, just click off ‘I’ll connect to a provider later.’ You won’t be able to launch your campaign until you connect with a provider, but you can get your campaign ready and explore the platform.
- How much does it cost? Choose your pricing model here. For more details on the pricing models, read this article. You can change your mind later, even when the campaign is live! *Note: This sets the pricing model for your first campaign, as well as the default model for all future campaigns. You are always able to change both this campaign’s pricing model and the one for all future campaigns if you choose.
- Terms & conditions – You agree to these once you hit ‘Save & continue.’ If you’d like to read them, you’ll find them here.
Review

You’re done!
Click here to view Help Centre articles on Organization Management.
Click here to view Help Centre articles on Campaign Management.


