Set up a sponsor match promotion (or simply highlight a sponsor) on any of our platforms.
NOTE: This article refers to a fully customizable banner only available to organizations. For help with the personal banner (your user name and personal message endorsing your campaign), click here.
The first thing to note is: that you do not HAVE to use this feature to highlight sponsors.
You can use the available banner for whatever you like – many organizations use it to send visitors to another campaign they are running, which may apply to a different subset of people.
For example, if you were running separate campaigns for Canadian and US supporters, you would want to ensure the right visitors are on the right campaign. Updating your banner is a good way to do that, as this banner will be the first thing they see. You just have to skip the ‘Matching’ part of the instructions below.
Part 1: Where does the sponsor match appear? #
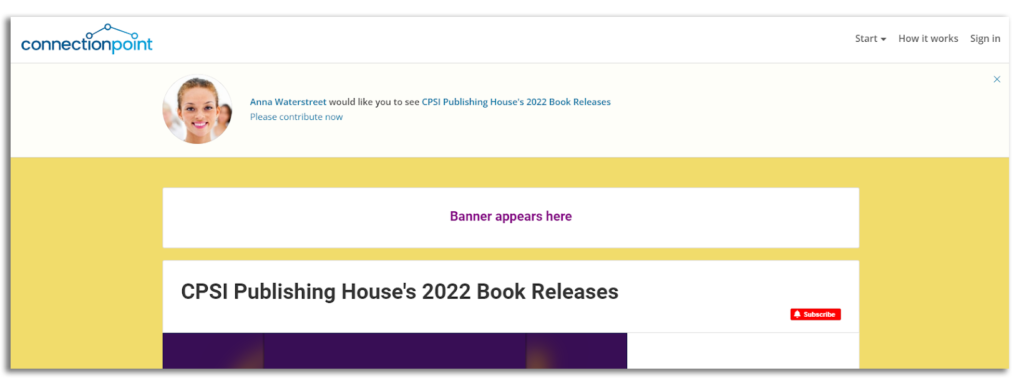
Promotional Banner #
Your banner appears at the top of the campaign:
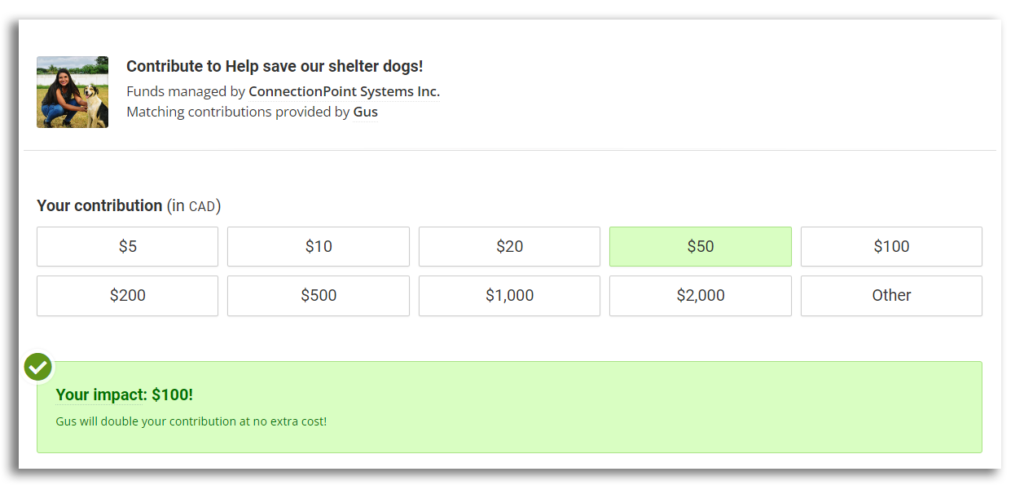
Matching #
When your supporters go to contribute, they’ll be made aware of the impact of their contribution:
Part 2: How do I set up a sponsor match? #
- Set up the promotion details: Basic details, appearance, and matching (if applicable);
- Set up the sponsorship: Apply your promotion details to a campaign.
Part 2.1: Set up the promotion details #
STEP 1 – Click ‘Sponsors’ and then ‘Promotions’ in the organization profile’s navigation menu.
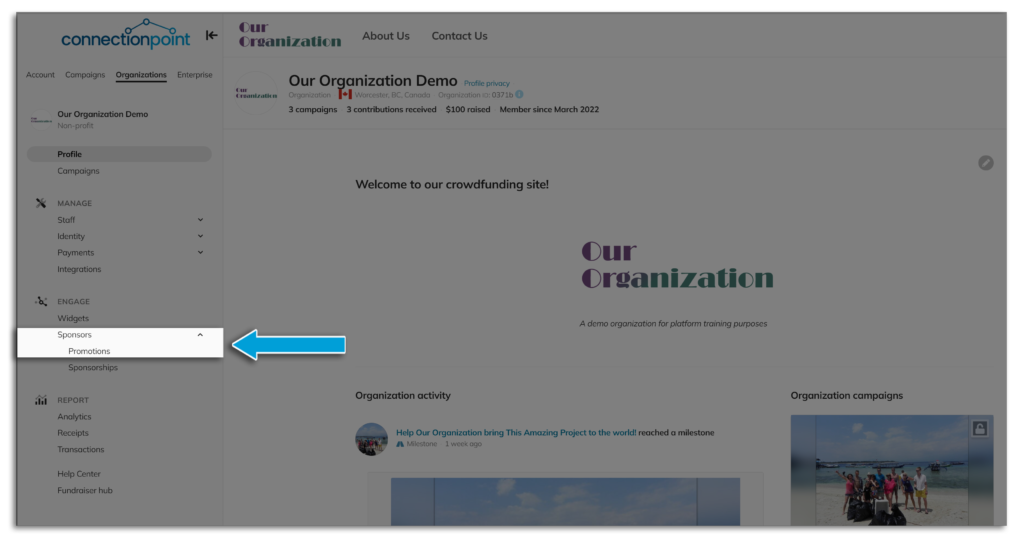
To find your organization profile, click here.
STEP 2 – Click ‘Create a promotion.’

STEP 3 – Fill out the ‘Basics’ of your promotion.
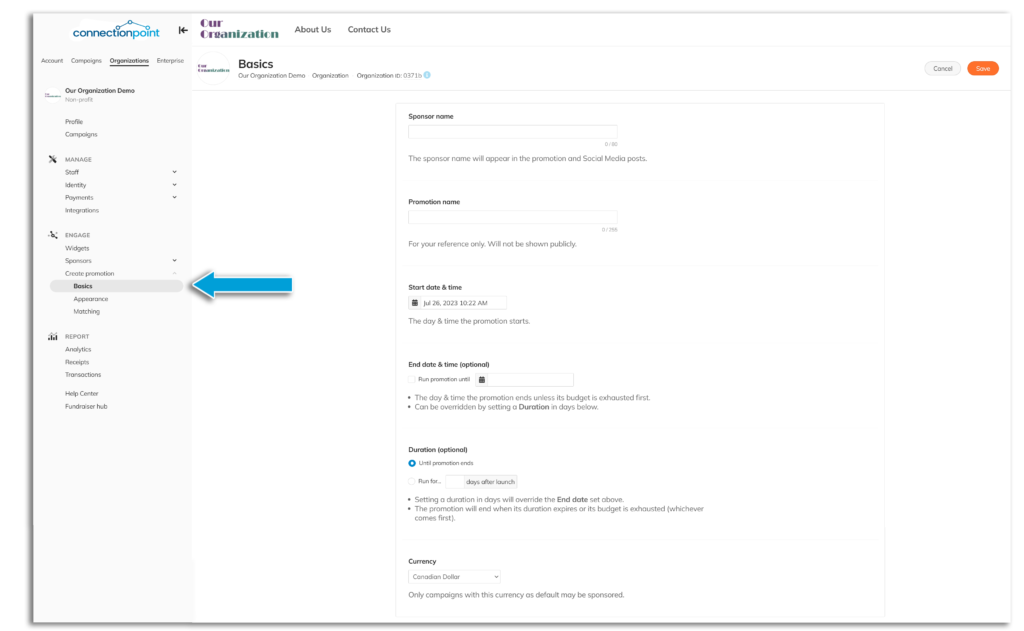
Here are some helpful tips:
Sponsor name – this will appear in public places. If your sponsor wants to remain anonymous, you can put something like “Our generous sponsor.”
Promotion name – an internal identifier; it won’t be public-facing.
STEP 4 – Format the banner’s ‘Appearance.’
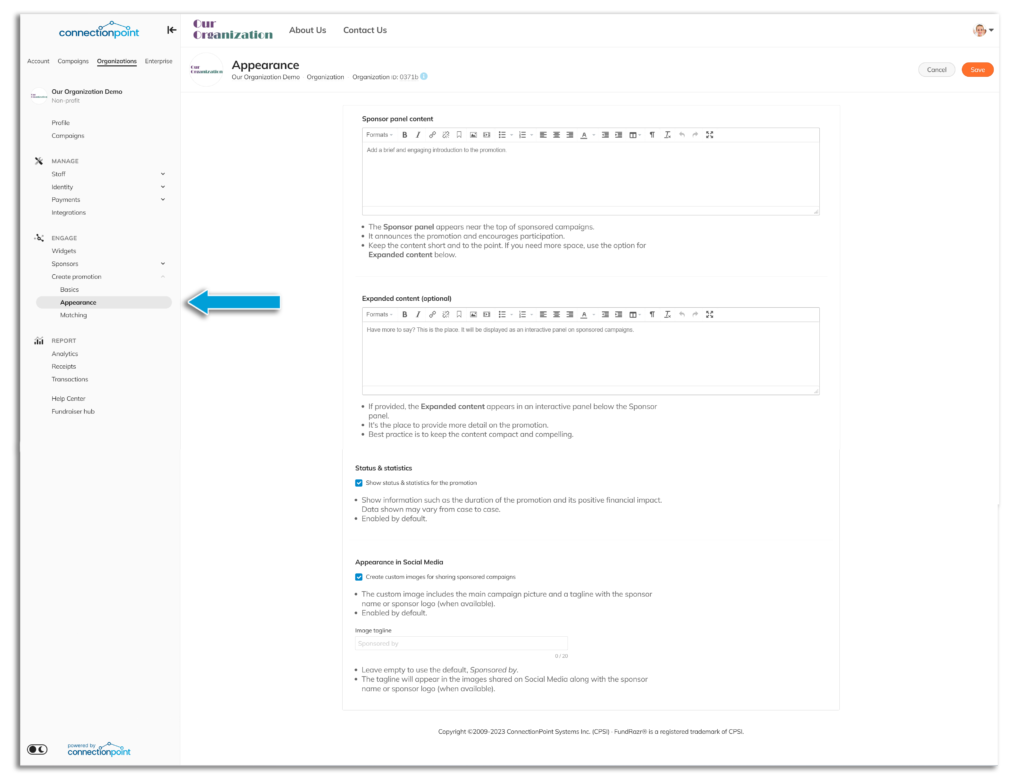
Here are some helpful tips:
Sponsor panel content – this is the ‘front’ of the banner, what visitors will see immediately when landing on your campaign.
Expanded content (optional) – Have a lot to say but don’t want to overdo it on the front? This will put a ‘More’ option on your banner and ‘flip’ it around to show the ‘back’ for extra info.
Note: This is the same editor as for your campaign story. Click here for a guide on formatting with this editor.
STEP 5 (optional) – Set up your Matching parameters.
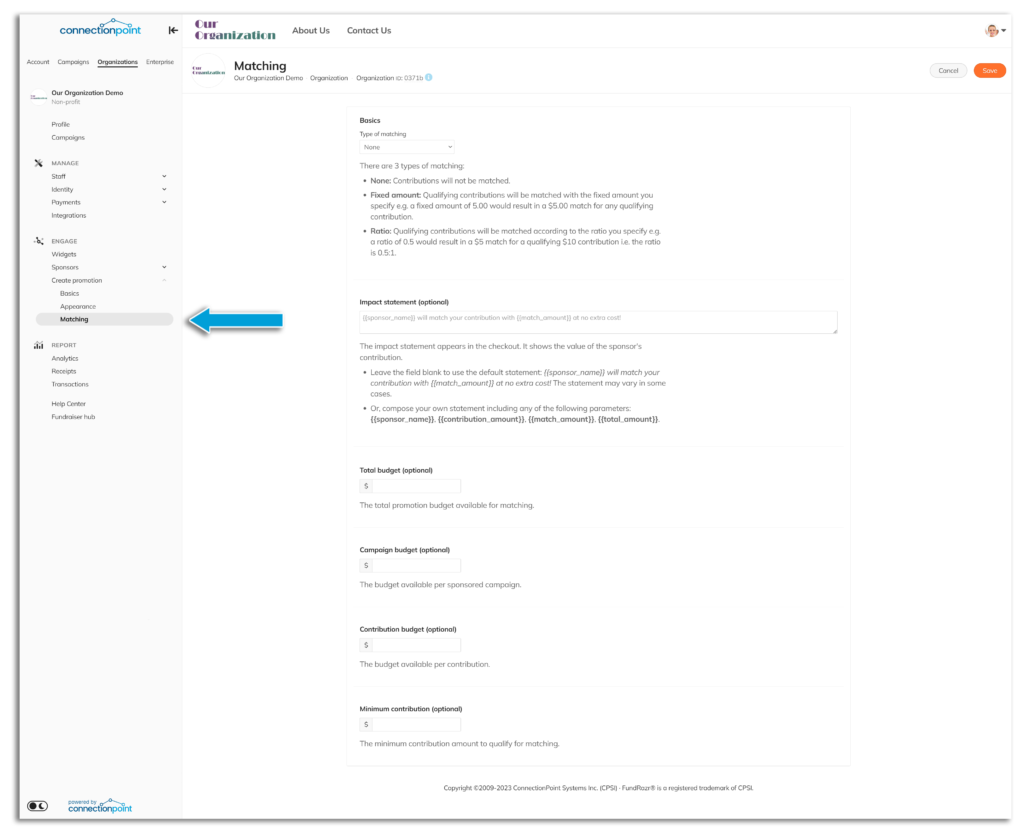
Here are some helpful tips:
Fixed amount – Every donation triggers a specific fixed amount to be added.
Ratio – Donations are matched using a specified ratio of the original contribution. For example, 1:1 means a $50 donation will be matched with another $50 (for $100 total). 0.5 means a $50 donation will be matched with another $25 (for $75 total). The most popular is 1:1.
Total budget – What is the cap of your sponsorship (if applicable)? I.e., what is the maximum amount TOTAL that they will give you?
Campaign budget – Limits what a campaign receives. For example, if your sponsor is contributing $10,000 total, and you have two campaigns to apply it to, you can set this at $5,000. If you do NOT specify, the platform will apply matching on a first-come-first-serve basis.
*NOTE regarding sub-campaigns: if you have sub-campaigns, the amount you budget on the main campaign will apply collectively to that campaign and all of its sub-campaigns on a first-come-first-serve basis (e.g. if your whole budget is $5000 and someone donates $5000 to one sub-campaign, that will use the whole budget). If you would like the budget to be spread equally among all sub-campaigns, you must create a promotion for EACH sub-campaign with the same budget.
Minimum contribution – Do you only want the matching to apply to certain levels of contributions? For example, only contributions of $20 or more will be matched? Set that here.
STEP 6 – SAVE!!

Part 2.2: Create the sponsorship (aka how to apply the promotion you just created) #
We’ve created the promotion, and now we need to APPLY it to create a Sponsorship.
STEP 1 – Click ‘Sponsors’ and then ‘Sponsorships’ in the organization profile’s navigation menu.
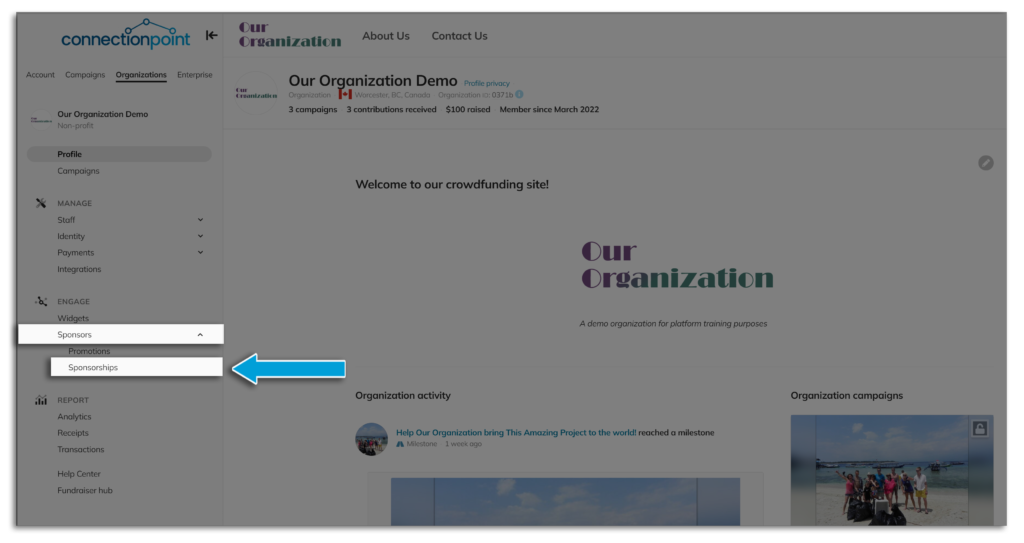
STEP 2 – Click ‘Create a sponsorship.’
Or ‘Edit’ for a sponsorship you’ve already created.
STEP 3 – Select the campaign you want the promotion applied to, as well as the promotion itself.
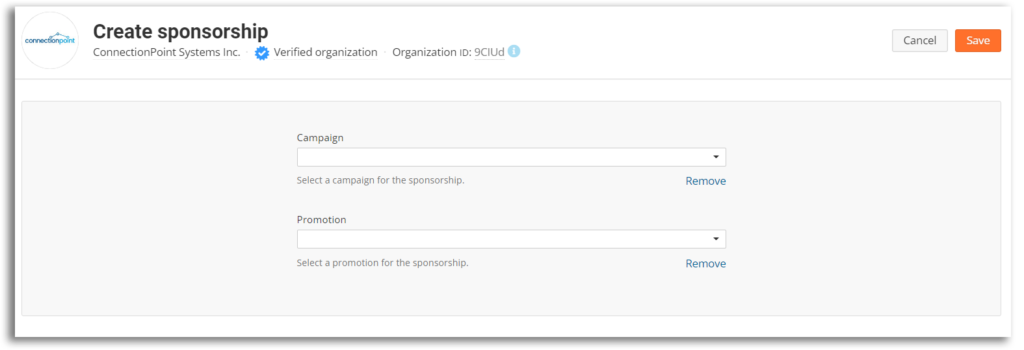
STEP 4 – SAVE!!

Part 3: What will the banner look like? #
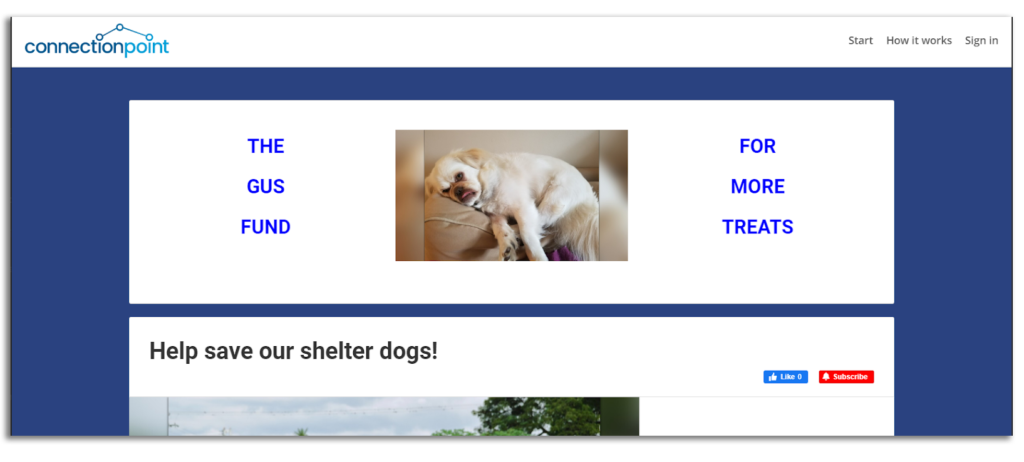
You’ll see the campaign’s banner immediately when you’re done. Here is ConnectionPoint Director of Operation Daman’s dog (aka Boss) Gus, proudly representing his sponsorship for more treats:
