
We’ve made it easier than ever to control when your campaign launches and ends with our new Timeline settings page.
What’s New #
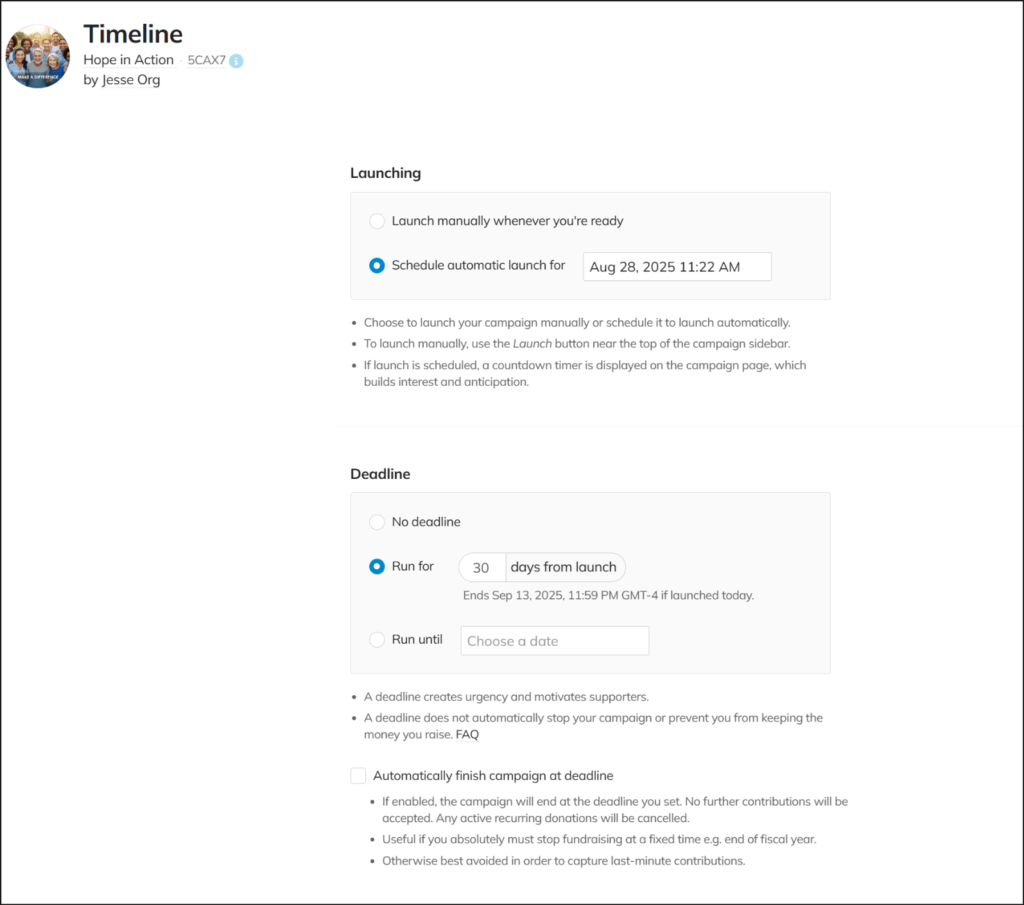
- All launch and deadline settings in one place – Manage your campaign’s start and end dates from the new Timeline page in your campaign settings.
- Scheduled Campaign Launch – Use the new Warm Up status to schedule a future launch date and build excitement with a countdown timer on your page. Supporters can even subscribe to a launch notification.
How to Schedule Your Campaign Launch #
- Go to Your Timeline Settings
- Navigate to Manage > Settings > Timeline in your campaign editor.
- Enable Automatic Launch
- Select Schedule automatic launch.
- Pick Your Date & Time
- Choose a date and time at least one hour in the future.
- Save Your Campaign
- Once saved, your campaign will automatically enter Warm Up status until the scheduled launch time.
- During Warm Up, your campaign page will show a countdown timer, and visitors can subscribe to get a notification as soon as your campaign goes live.

Pro Tips #
- Use Warm Up status to promote your campaign before it launches—share the countdown link on social media or with your email list.
- Make sure your campaign content, images, and perks are finalized before scheduling your launch.
- You can adjust your scheduled date/time anytime before it goes live.


