
Add a campaign background for extra personalization and to help convey tone of voice.
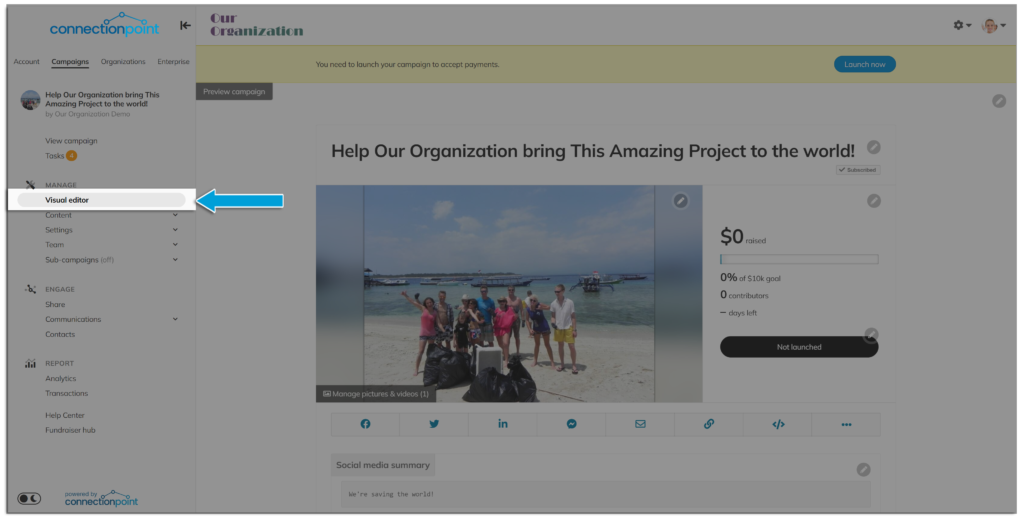
STEP 1 – Turn on your Visual Editor.
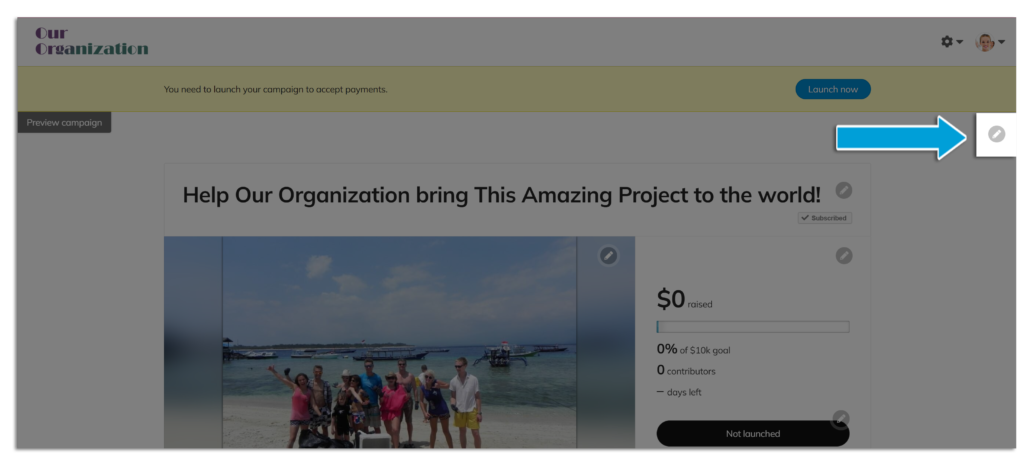
STEP 2 – Click the edit pencil in the top right corner of your campaign (you might have to scroll to the right if your screen is zoomed in close):
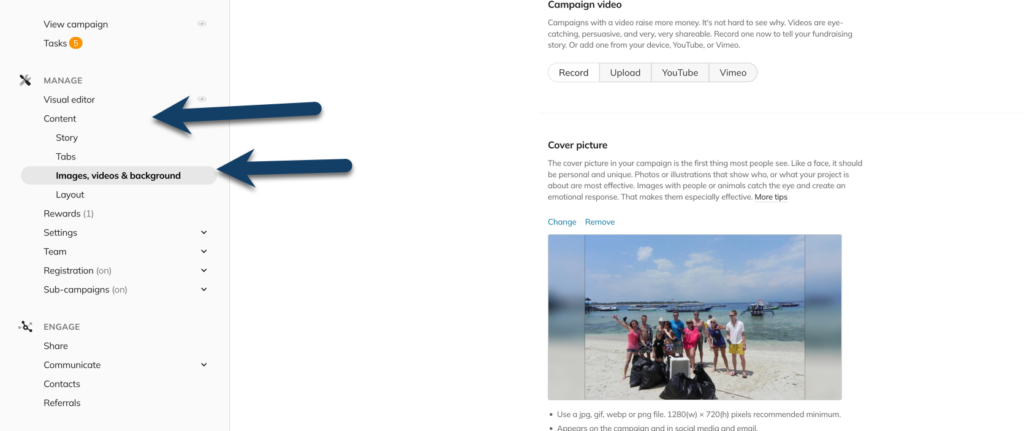
OR you can click ‘Content’ then ‘Images, videos & background’ in your navigation menu:
STEP 3—Scroll to the bottom of the layouts, then choose a colour, add a custom colour, or upload a picture. We encourage you to meet the recommended picture size (Use a JPG, GIF, or PNG). For best results, it should be at least 1920(w)×1080(h) pixels.) as smaller pictures will look fuzzy or grainy and detract from the campaign’s visual appeal.
Remember, the key is to create a visually appealing and cohesive campaign that communicates the essence of your project quickly and effectively. Consider these factors when choosing a picture for your background:
- High quality (make sure it’s not blurry!)
- Relevant
- Shows your organization’s branding elements (logos, colours, fonts, etc.)
- Minimalistic – if the picture is too busy or demands attention, it might detract from the campaign.
STEP 4 – Save. Then check out how your campaign background looks and change if necessary!


